
目次
はじめに
UbuntuにRedmine 5.1/6.0をインストールする手順をステップバイステップで紹介します。コピー&ペーストで実行可能です。Ruby 3.2, 3.3, MySQL 8.0を使っています。CORS対応, HTTPS化についても解説しています。
本稿ではPumaで稼働確認するところまでを記述しています。本番環境に向けては、次を参考にしてください。WebサーバーにApache/Nginxを組み合わせる構成について説明しています。

TrelloとRedmineを比較している方、Redmineの展開に悩んでいる方、ぜひご一読を!

参考情報
- Installing Redmine (redmine.orgから)
- HowTo Install Redmine 5.0.x on Ubuntu 20.04/22.04 with Apache2 (redmine.orgから)
- UbuntuのRedmineをApacheで動かす (本番向けに)
環境
- OS: Ubuntu Server 22.04 LTS
- Redmine: 5.1, 6.1
- Ruby: 3.2, 3.3
- Rails: 6.1, 7.2 (Redmineのインストールに連動)
- MySQL: 8.0
Ruby, Rails, MySQLのバージョンは、Redmineの前提ソフトウェアのバージョンを確認してください。以下、執筆時点での最新版を例として説明しているので、適宜最新情報に合わせてください。
セットアップの手順
下記の順番でセットアップを行います。
- Ubuntu環境のセットアップ
- MySQLのセットアップ
- Rubyのセットアップ
- Redmineのセットアップ
Ubuntu環境のセットアップ
Ubuntuのインストール
特殊な設定はないので手順は割愛します。 (因みに筆者の場合は、Windows 11上のVMwareにサーバー版をインストールしています)
ユーザーの作成
Redmineの操作を行うユーザー (redmine) を作成します。
sudo adduser redminesudoを操作できるようにしておきます。
sudo gpasswd -a redmine sudoこの後の作業は、ユーザーredmineにログインして行います。
ライブラリのインストール
パケージリストを最新化し、インストール済みのモジュールを更新します。
sudo apt updatesudo apt upgrade -yこの後の作業の前提となるライブリをインストールします。
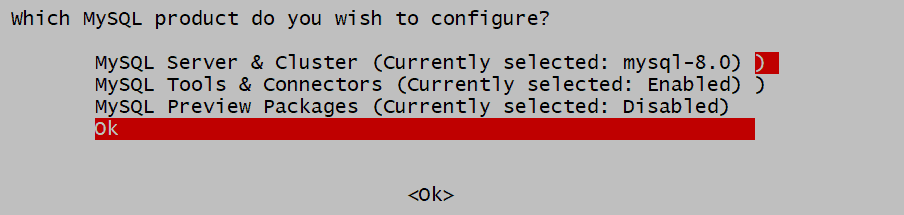
sudo apt install -y build-essential git vim libffi-dev libyaml-devMySQLのセットアップ
MySQLのインストール
MySQLのCommunity Edition (こちらから) をダウンロードします。
上記ページからパッケージをダウンロードするためのURLを取得します。wgetでパッケージをダウンロードし、aptのレポジトリに追加します。(下記のファイル名は執筆時の最新版)
cd ~
wget https://dev.mysql.com/get/mysql-apt-config_0.8.29-1_all.deb
sudo dpkg -i mysql-apt-config_0.8.29-1_all.deb
インストール対象を聞かれるので、デフォルトのままでOKします。
パッケージリストを更新しインストールします。
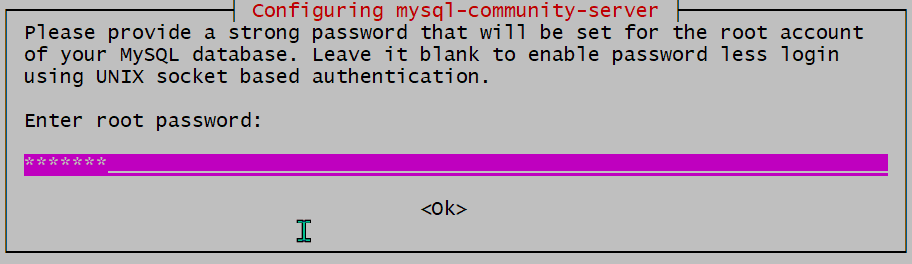
sudo apt updatesudo apt install -y mysql-server libmysqlclient-devrootのパスワードを設定します。
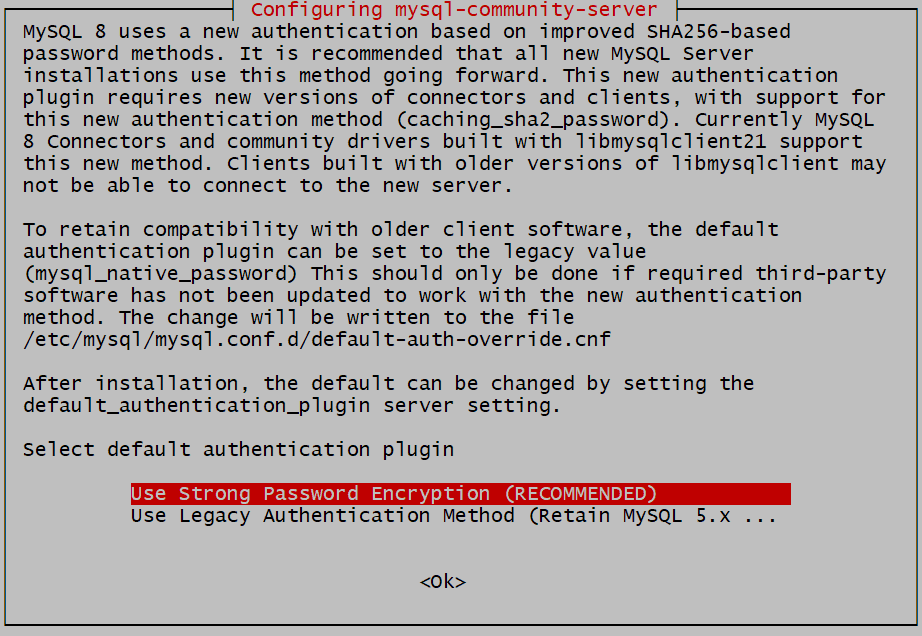
“Use Strong Password Encryption”を選択します。
MySQLが稼働していることを確認します。
systemctl status mysql次のような出力が表示され、Active: active が確認できれば稼働しています。
● mysql.service - MySQL Community Server
     Loaded: loaded (/lib/systemd/system/mysql.service; enabled; vendor preset: enabled)
     Active: active (running) since Fri 2022-06-17 06:53:26 UTC; 16s ago
       Docs: man:mysqld(8)
             http://dev.mysql.com/doc/refman/en/using-systemd.html
   Main PID: 26378 (mysqld)
     Status: "Server is operational"
      Tasks: 38 (limit: 4575)
     Memory: 359.0M
     CGroup: /system.slice/mysql.service
             └─26378 /usr/sbin/mysqld
安全性の低いデフォルトの設定を変更します。
sudo mysql_secure_installation設定例: (特に要件は無いので適宜設定してください)
redmine@redmine-test:~$ sudo mysql_secure_installation

Securing the MySQL server deployment.

Enter password for user root:

VALIDATE PASSWORD COMPONENT can be used to test passwords
and improve security. It checks the strength of password
and allows the users to set only those passwords which are
secure enough. Would you like to setup VALIDATE PASSWORD component?

Press y|Y for Yes, any other key for No: N
Using existing password for root.
Change the password for root ? ((Press y|Y for Yes, any other key for No) : N

 ... skipping.
By default, a MySQL installation has an anonymous user,
allowing anyone to log into MySQL without having to have
a user account created for them. This is intended only for
testing, and to make the installation go a bit smoother.
You should remove them before moving into a production
environment.

Remove anonymous users? (Press y|Y for Yes, any other key for No) : Y
Success.


Normally, root should only be allowed to connect from
'localhost'. This ensures that someone cannot guess at
the root password from the network.

Disallow root login remotely? (Press y|Y for Yes, any other key for No) : Y
Success.

By default, MySQL comes with a database named 'test' that
anyone can access. This is also intended only for testing,
and should be removed before moving into a production
environment.


Remove test database and access to it? (Press y|Y for Yes, any other key for No) : Y
 - Dropping test database...
Success.

 - Removing privileges on test database...
Success.

Reloading the privilege tables will ensure that all changes
made so far will take effect immediately.

Reload privilege tables now? (Press y|Y for Yes, any other key for No) : Y
Success.
データベースとユーザーの作成
MySQLのシェルを起動します。
mysql -u root -pユーザーとデータベースを作成します。my_passwordの変更を忘れずに行ってください。
CREATE DATABASE redmine CHARACTER SET utf8mb4;
CREATE USER 'redmine'@'localhost' IDENTIFIED BY 'my_password';
作成したユーザーに作成したデータベースへの操作を許可します。
GRANT ALL PRIVILEGES ON redmine.* TO 'redmine'@'localhost';
FLUSH PRIVILEGES;
EXIT;
Rubyのセットアップ
rbenvのインストール
Rubyのインストールには、何らかのバージョン管理ツールを使うことが推奨されています。ここではRubyのバージョン管理ツールとしてrbenvをインストールします。
sudo apt install -y rbenv初期化を行います。
rbenv init下記のメッセージが表示されます。
# Load rbenv automatically by appending
# the following to ~/.bashrc:
eval "$(rbenv init -)"
上記の内容を.bashrcに追記します。これにより、シェルの起動時にPATHの設定などが行われます。
cd ~
vim .bashrc
変更内容を反映します。
source .bashrcruby-buildのインストール
rbenvはRubyのインストール機能を持っていないため、ruby-buildと組み合わせます。
cd ~
mkdir -p "$(rbenv root)"/plugins
git clone https://github.com/rbenv/ruby-build.git "$(rbenv root)"/plugins/ruby-build
curl -fsSL https://github.com/rbenv/rbenv-installer/raw/main/bin/rbenv-doctor | bash
最後のコマンドで、下記のような診断結果が表示されます。
Checking for `rbenv' in PATH: /usr/bin/rbenv
Checking for rbenv shims in PATH: OK
Checking `rbenv install' support: /home/redmine/.rbenv/plugins/ruby-build/bin/rbenv-install (ruby-build 20211203)
Counting installed Ruby versions: none
  ...
Auditing installed plugins: OK
これでrbenvを使ってRubyをインストールする準備が完了しました。
Rubyのインストール
インストール可能なRubyのバージョンを確認します。
rbenv install --listRedmine 5.1の場合は、バージョン3.2の最新版、Redmine 6.0の場合はバージョン3.3の最新版を選択してインストールします。(執筆時点では3.2.3)
rbenv install 3.2.3
rbenv global 3.2.3
rbenvは、使用するRubyのバージョンをlocalまたはglobalに指定できます。localの指定は、指定時のディレクトリに対して有効になります。Rubyの実行時には、実行するRubyのバージョンを、現行ディレクトリまたは上位のディレクトリで検索します。もし見つかればそのバージョンが、もし見つからなければglobalの指定が使用されます。
インストール後にバージョンを確認します。
ruby -vこの記事は元々はRedmine 5.0を対象に書かれていました。Redmine 5.0も同様の手順でインストールできますが、Rubyは 3.1を使用する必要があります。
Redmineのセットアップ
Redmineのインストール
Redmine.orgのサイトから、最新版をダウンロードし、ファイルを展開します。(執筆時点では5.1.2)
wget https://www.redmine.org/releases/redmine-5.1.2.tar.gzcd /opt
sudo tar xvf ~/redmine-5.1.2.tar.gz展開後のディレクトリには、バージョン番号が入っていて扱いにくいので、省略名 (redmine) で扱えるようにリンクを作成します。またファイルの所有者を変更します。
sudo ln -s redmine-5.1.2 redmineディレクトリとファイルのオーナーを変更します。
sudo chown -R redmine:redmine redmine/データベース接続の作成
データベース接続は、redmine/config/database.ymlに定義します。redmine/config/database.yml.exampleをコピーして編集します。
sudo cp redmine/config/database.yml.example redmine/config/database.yml上記ファイルにはすでにMySQLに対応した定義が記述されています。
sudo vim redmine/config/database.yml下記項目を上書きします。
- username: redmine
- password: MySQLのセットアップで定義した上記ユーザーのパスワード
production:
  adapter: mysql2
  database: redmine
  host: localhost
  username: redmine
  password: "<password>"
  encoding: utf8mb4
  variables:
    transaction_isolation: "READ-COMMITTED"
database.ymlには、productionの他に、development, testに対する定義も含まれています。Railsではproduction / development / test で稼働環境を切り替えられるようになっており、そのためにデータベースを分けて定義できるようになっています。
Redmineを開発するわけではないので、production環境のみ設定します。この後のインストール手順でもproduction環境のみを対象にしています。(オフィシャルのインストールガイドの説明がそうなっているので …)
Gemのインストール
Gemfileに記述されたgemをインストールします。ただしdevelopment, test環境は対象から除外します。
cd /opt/redmine
bundle config set --local without 'development test'
bundle install
Session Store Secretの作成
セッションハイジャックによる不正アクセスを防ぐために必要な定義を行います。
RAILS_ENV=production bundle exec rake generate_secret_tokenデータベースの初期化
スキーマを作成し、デフォルトデータを設定します。
RAILS_ENV=production bundle exec rake db:migrate
RAILS_ENV=production bundle exec rake redmine:load_default_data
途中で言語を選択するように求められます。日本語で使用する場合は、”ja”を選択します。この選択は、例えばチケットのステータスや優先度などの選択肢に使われます。
Select language: ar, az, bg, bs, ca, cs, da, de, el, en, en-GB, es, es-PA, et, eu, fa, fi, fr, gl, he, hr, hu, id, it, ja, ko, lt, lv, mk, mn, nl, no, pl, pt, pt-BR, ro, ru, sk, sl, sq, sr, sr-YU, sv, th, tr, uk, vi, zh, zh-TW [en] en稼働確認
Pumaを使ってRedmineサーバーを起動します。
まずGemfile.localを作成します。
cd /opt/redmine
sudo vim Gemfile.local
次の内容を書き込みます。
gem 'puma'Gemをインストールします。
bundle install次のようなメッセージが表示されます。Gemfileにはtest環境にPumaが定義されており、それとの重複が指摘されているようです。ただ今回はtest環境はインストールの対象としていないので、実際の重複は発生しません。このためこのメッセージは無視します。
Your Gemfile lists the gem puma (>= 0) more than once.
You should probably keep only one of them.
Remove any duplicate entries and specify the gem only once.
While it's not a problem now, it could cause errors if you change the version of one of them later.
Webサーバーを起動します。
bundle exec puma -e productionWebブラウザで下記にアクセスします。
http://<Redmineサーバーアドレス>:9292Redmineの画面が表示されるのでログインします。
- User ID: admin
- Password: admin
CORSへの対応
RedmineをWebブラウザから利用するだけであればCORSへの対応は必要ありません。筆者の場合は、別のWebアプリからRedmineのAPIを呼び出しており、このためにCORSへの対応が必要となりました。
CORSへの対応にはRack CORS Middlewareというライブラリを利用しました。
Gemfile.localを編集します。
cd /opt/redmine
sudo vim Gemfile.local
次を追加します。
gem 'rack-cors'Gemをインストールします。
bundle installconfig/initializers/cors.rbを作成します。
sudo vim config/initializers/cors.rb次の内容を書き込みます。
Rails.application.config.middleware.insert_before 0, Rack::Cors do
  allow do
    origins '*'
    resource '*', headers: :any, methods: [:get, :post, :patch, :put, :delete, :options]
  end
end
Webサーバーを再度起動します。
bundle exec puma -e productionWebブラウザで下記にアクセスします。
http://<Redmineサーバーアドレス>:9292Redmineの画面が表示されるのでログインします。WebブラウザからのアクセスではCORSを確認できませんが、これでCORS対応となっています。
PumaによるHTTPS化
参考資料: Puma: A Ruby Web Server Built For Parallelism | Binding TCP Socket
Pumaを使ってHTTPS化します。ここでは、自己署名証明書 (オレオレ証明書) を使います。
まず秘密鍵 (private.key) と署名リクエスト (request.csr) を作成します。秘密鍵は暗号化せずに作成しています。暗号化していると、Pumaを起動するサービス中でPass Phraseの入力を求められ、エラーとなるためです。
cd ~
openssl genrsa -out private.key 2048
openssl req -new -key private.key -out request.csr
必須項目は、Country Name, Organization Name, Common Nameです。
Common Nameは、Webブラウザに入力されたアドレスと比較されます。WebサーバーがFQDN (Fully Qualified Domain Name) を持っている場合は、それを指定します。IPアドレスしか持たない場合は、IPアドレスを指定します。
証明書 (certificate.crt) を生成します。
openssl x509 -in request.csr -out certificate.crt -req -signkey private.key -days 365Pumaを起動します。
cd /opt/redmine
bundle exec puma -b 'ssl://0.0.0.0:9393?key=/home/redmine/private.key&cert=/home/redmine/certificate.crt' -e production
Webブラウザで下記にアクセスします。
https://<サーバーアドレス>:9393自己署名証明書のため警告が表示されますが、指示に従ってアクセスすると、Redmineのページが表示されます。
サービス化
毎回コマンドラインから起動するのは手間なので、OSにサービスとして登録して、OS起動時に自動的に起動されるようにします。
起動するためのシェルを~/start_redmine.shとして作成します。
cd ~
vim start_redmine.sh
HTTPSで起動する場合は、次の内容を書き込みます。
#!/bin/sh

cd /opt/redmine
/home/redmine/.rbenv/shims/bundle exec puma -e production
HTTPSで起動する場合は、次の内容を書き込みます。
#!/bin/sh

cd /opt/redmine
/home/redmine/.rbenv/shims/bundle exec puma -b 'ssl://0.0.0.0:9393?key=/home/redmine/private.key&cert=/home/redmine/certificate.crt' -e production
実行可能に変更します。
chmod +x start_redmine.shサービスの定義ファイルを/lib/systemd/system/redmine.serviceとして作成します。
sudo vim /lib/systemd/system/redmine.service次を書き込みます。
[Unit]
Description=Start Redmine Server
After=network.target

[Service]
Type=simple
ExecStart=/home/redmine/start_redmine.sh
Restart=always

[Install]
WantedBy=multi-user.target
サービスとして登録します。
sudo systemctl enable redmineサービスを開始します。
sudo systemctl start redmineサービス化に関係するコマンド群
- 開始: sudo systemctl start redmine
- 停止: sudo systemctl stop redmine
- 再起動: sudo systemctl restart redmine
- 最新ログの表示: sudo journalctl -u redmine -e
- ログの監視: sudo journalctl -u redmine -f
変更履歴
| 日時 | 内容 |
| 2025/03/31 | インストールの対象にRedmine 6.0を追加 サービス化でpumaをHTTPSで起動する場合のコマンドを追記 |
| 2024/03/18 | 対象のソフトウェアのバージョンを更新 Redmine 5.0 -> 5.1 Ruby 3.1 -> 3.2 Ubuntu 20.04 -> 22.04 |
| 2023/06/23 | データベースの初期化時の言語の選択について追記 |
| 2023/05/08 | rack-corsの定義 (cors.rb) にdeleteを追加 |
| 2023/03/18 | 新しいバージョンのMySQLのインストール時に、ルートのパスワードを指定する方法について追記 確認ずみ環境に22.04 LTSを追加 |
| 2022/07/02 | ログの監視コマンドを修正 > sudo journalctl -unit=redmine -f |
| 2022/06/29 | PumaのHTTPS化後のアクセス先をhttpsに修正 > http:<サーバーアドレス>:9393 -> https:<サーバーアドレス>:9393 |
| 2022/06/25 | Databaseの作成対象にtest用DBの記述が残っていたものを削除 (コマンド例からは元々削除済み) |
| 2022/06/24 | test環境を除外 CORS対応を追記 HTTPS化を追記 サービス化について追記 |
| 2022/06/23 | 本番環境でのpumaの使用のセクションを削除 |
| 2022/06/21 | bundleのインストール対象からdevelopmentを除外 > bundle config set –local without ‘development’ |
| 2022/06/19 | 初版リリース |
