
This guide explains how to use the board for administrators.
Card Operation
Stepra adds a [Workflow] section to cards and displays the [Admin menu] if the user is a board administrator.
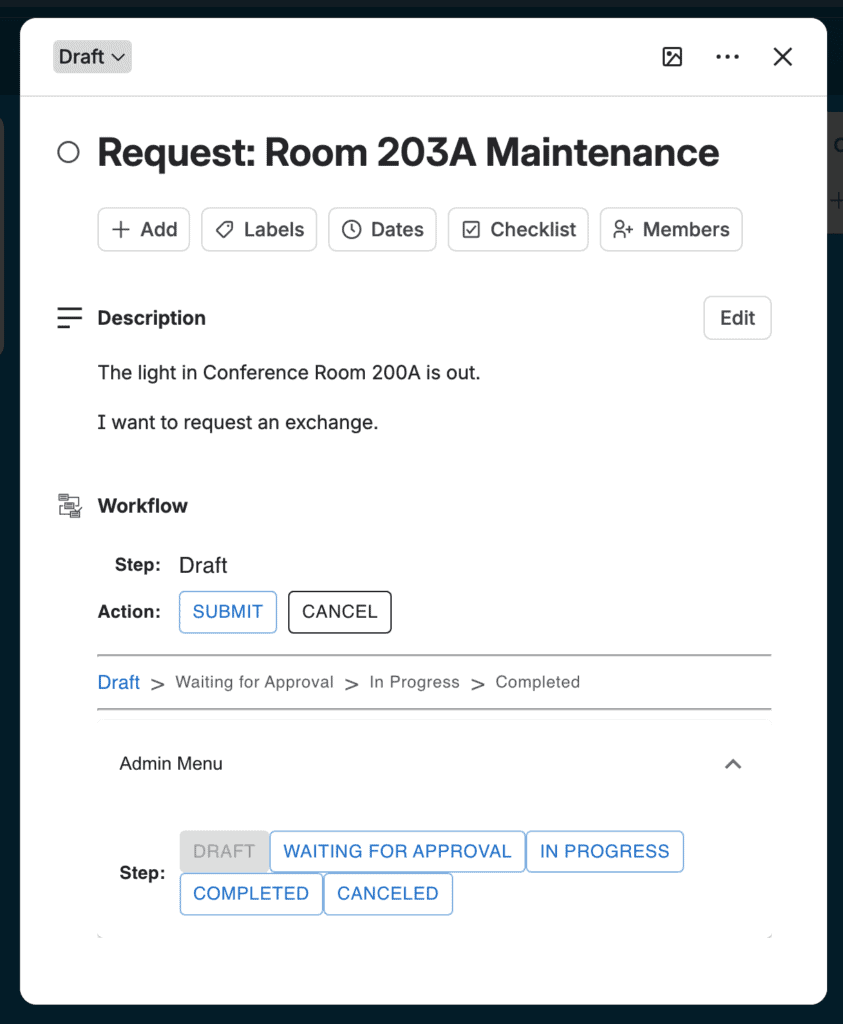
[Admin menu/Step]
Clicking [Admin Menu] will display [Steps]. You can change the current step directly by clicking it.
Additionally, if a card’s step is “undefined,” you can forcibly change it to any desired step.
Power-Up settings
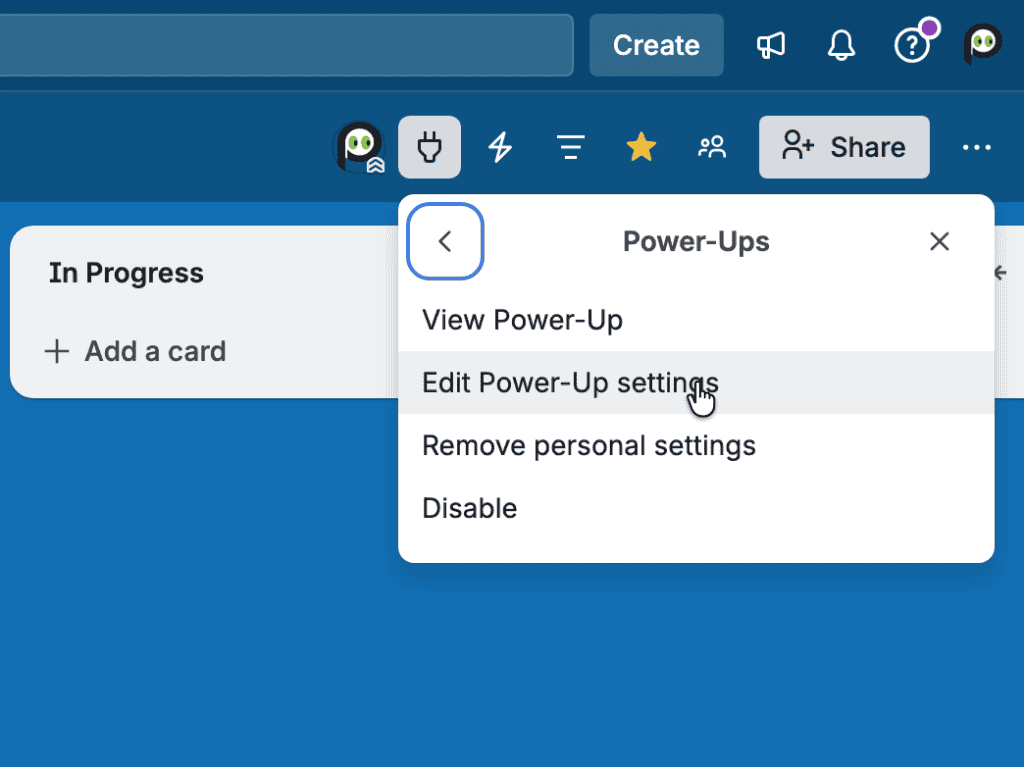
From the board’s Power-Up menu, open the Stepra [Edit Power-Up settings] screen and configure the various settings.
This setting can only be configured by the board administrator.
If there are multiple administrators
If multiple administrators change settings simultaneously, there is a risk of overwriting each other’s changes. Please be careful not to make changes at the same time. We recommend designating one administrator to make changes at a time.
Save frequently.
The “Edit Power-Up settings” screen may close if you accidentally click around it. In this case, the settings you are editing will not be saved. Therefore, it is recommended to save frequently while editing. This is due to Trello’s specifications and cannot be controlled by the Power-Up.
Start the setup
In [Edit Power-Up settings], you can switch between grouped settings using tabs. The following explanation describes the settings for each tab.
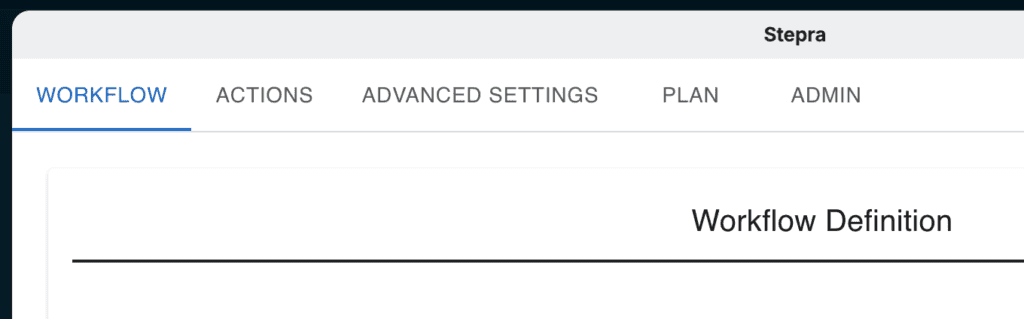
WORKFLOW Tab
The Workflow tab is where you define your workflow. A workflow is defined by “steps,” which represent the state of work, and “transitions,” which represent the movement between steps. Below is an example of a workflow definition. The leftmost column represents the “source step,” and the top row represents the “destination step.” Each cell defines the action that causes the transition.
For example, if you submit a card that is currently in the “draft” step, it will transition to the “awaiting approval” step.
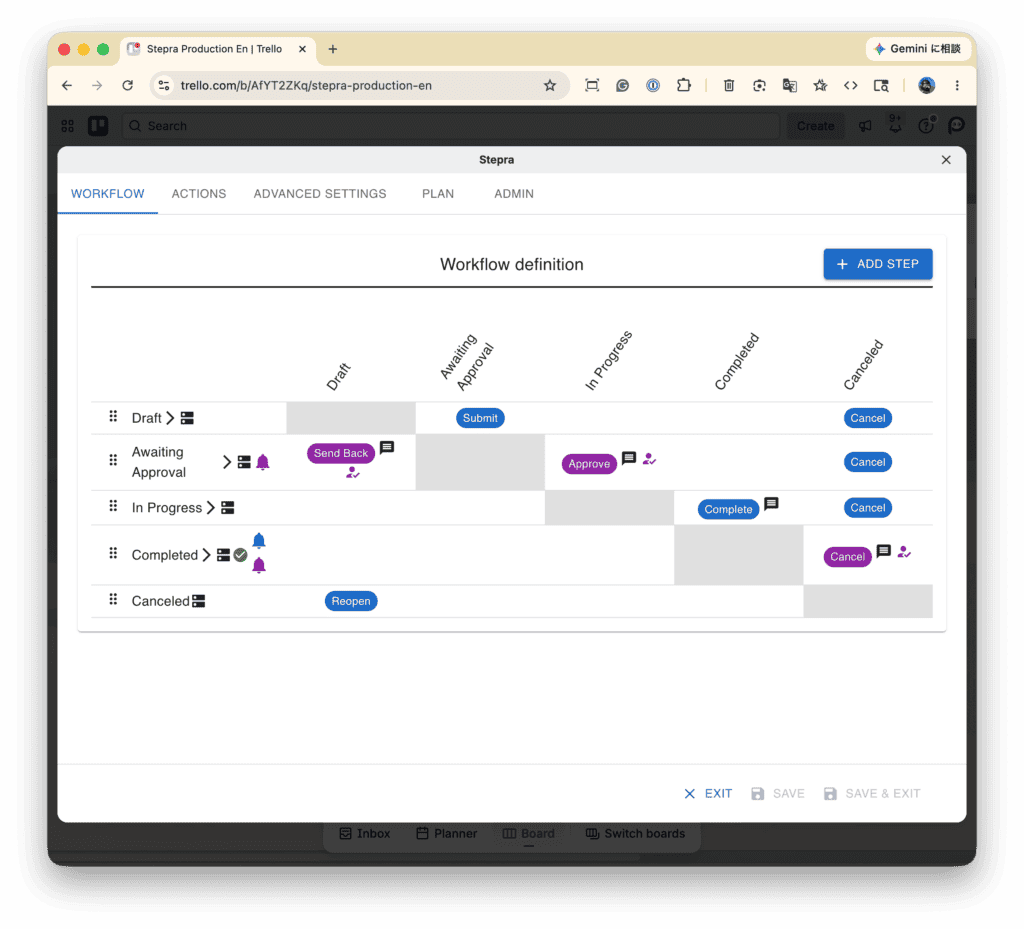
■ Add step
Click the [ADD STEP] button to add a step to the table. An editing screen will appear where you can enter the step details.
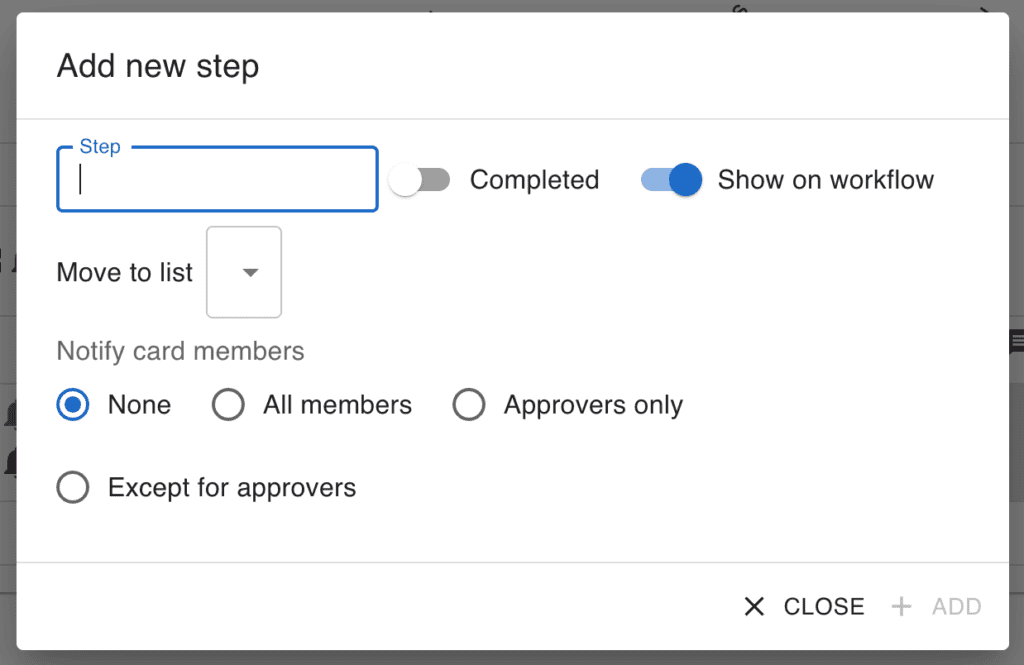
[Step]
Enter the name of the step.
[Completed]
When you check it, it marks the card as complete at this step.
[Show on workflow]
Checking this box will display this step in the workflow on the card. The card will show the workflow and your current step. Special steps, such as “Canceled,” can be excluded from the workflow display on the card by unchecking this box.
[Move to list]
Move the card to the specified list.
[Notify card members]
Notify card members of the step change and prompt them to take action. Choose from the following options:
- none
- All
- Approvers only
- Other than approvers
If no action by the “approver” is specified in the transition for that step, selecting [Approvers only] or [Other than approvers] will have the same effect as selecting [none] or [everyone], respectively.
■ Edit step
Click on a step in the table to open the editing screen. The items you can change are the same as when you “Add Step”.
■ Delete step
Click on a step in the table to open the editing screen. Press the [DELETE] button to delete the step.
If a transition that uses that step is already defined, the transition will also be deleted.
If that step is already used by a card (i.e., the card’s current state is that step), deleting the step will set the card’s step to “undefined”.
■ Add transition
Click on a cell in the table to add a transition. The row represents the source step, and the column represents the destination step.
Clicking a blank cell allows you to define a new transition. An editing screen will appear where you can enter the transition details.
[Select action]
Select an action from the list. You can also create a new action.
[For approver only]
Checking this box means that only users registered as approvers can perform this action.
[Logging]
When checked, the action’s execution and transition will be logged in the card’s [Comments and activity] section.
[Users/Approvers]
This will appear when you select [For approver only]. Select users as approvers and add them.
[Action]
This option appears when you select the [Create action] menu item under [Select Action]. Enter a name for the action you want to create.
■ Change transition
Click the cell where the transition is defined to open the transition editing screen. The items you can change are the same as in “Add Transition”.
■ Delete transition
Click the cell where the transition is defined to open the transition editing screen. Click the [DELETE] button to delete the transition.
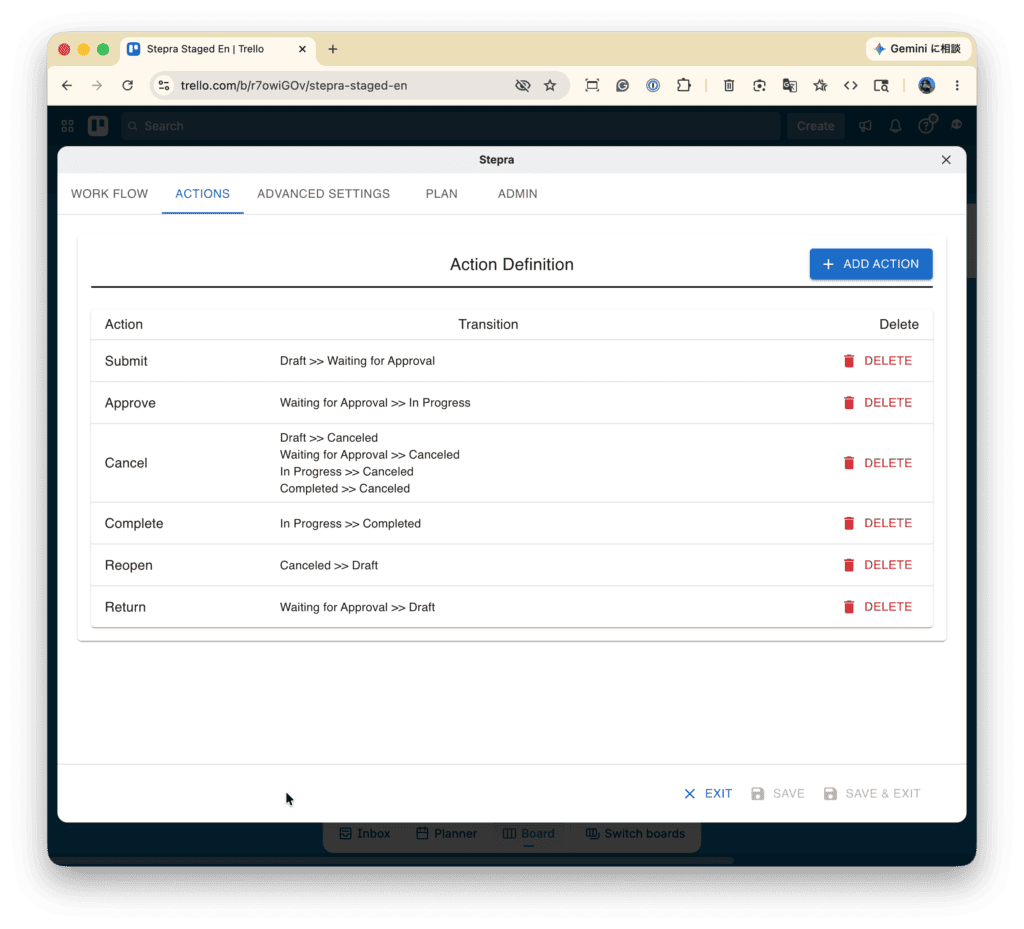
ACTIONS Tab
The Actions tab defines the actions that trigger transitions.
Actions can be defined either together with a workflow or independently, as described here.
■ Add action
Click the [ADD ACTION] button to add the action to the list. An editing screen will appear where you can enter the action name.
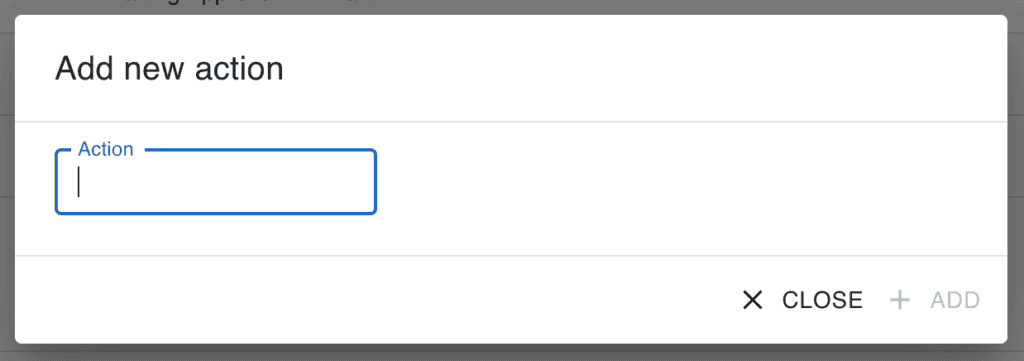
[Action]
Enter the name of the action.
■ Change action
Click an action on the list to open the action editing screen. The items you can change are the same as in “Add Action”.
■ Delete action
Click an action on the list to open the action editing screen. Click the [DELETE] button to delete the action. Alternatively, you can delete the action by clicking the [DELETE] button directly on the list.
If a transition that uses that action is already defined, deleting the action will also delete the transition.
ADVANCED SETTINGS Tab
The Advanced Settings tab allows you to configure various settings.
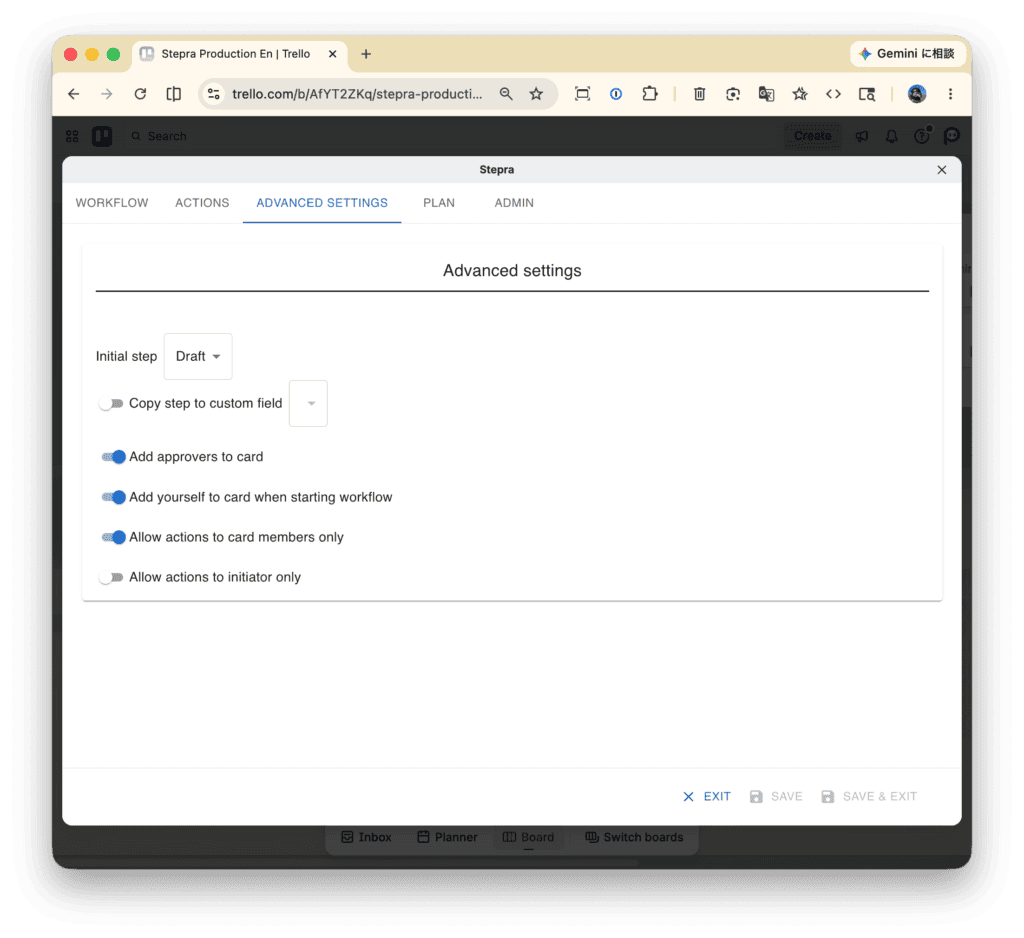
[Initial step]
Select the initial step to set when you press the [START WORKFLOW] button on the card after creating it.
[Copy step to custom field]
When checked, the card’s steps will be copied to a custom field when the card’s steps transition. Select the custom field to which this copy will be made. The custom field must be created on the board beforehand.
[Add approvers to card]
When checked, the approver defined in “Transition” will be added as a card member when the card step transitions to a step that requires an action from an approver (e.g., “Awaiting Approval”).
Actions can be performed by anyone, not just card members. However, only card members are prompted to take action. To prompt an approver to take action, the approver must be added as a card member. This can be done manually in advance or automatically with this option.
[Add yourself to card when starting workflow]
When checked, Stepra automatically adds you as a card member when you start a workflow. Being a card member lets you follow updates and changes to the card.
[Allow actions to card members only]
When checked, only card members can perform actions. Since anyone on the board can interact with a card by default, there’s a risk that someone unrelated to the workflow accidentally executes an action. Restricting actions to card members helps prevent that kind of mistake.
This setting does not affect the approval step. Approvers in the approval step do not need to be card members to perform actions.
[Allow actions to initiator only]
When checked, only the initiator can perform actions. Whether or not they are a card member does not affect this.
This setting does not affect the approval step. Approvers in the approval step can perform actions even if they are not the original creator.
PLAN Tab
The Plans tab allows you to view your Stepra subscription plan. You can also apply to upgrade to the Pro plan if needed.
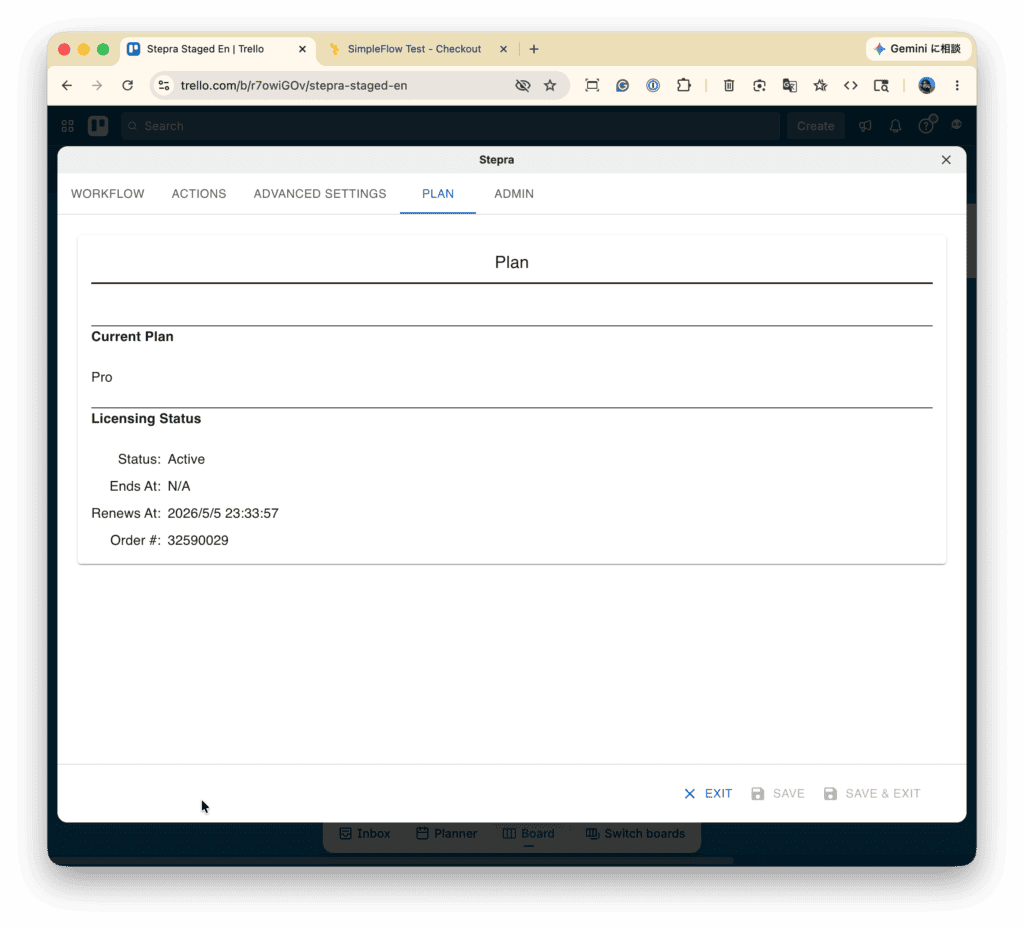
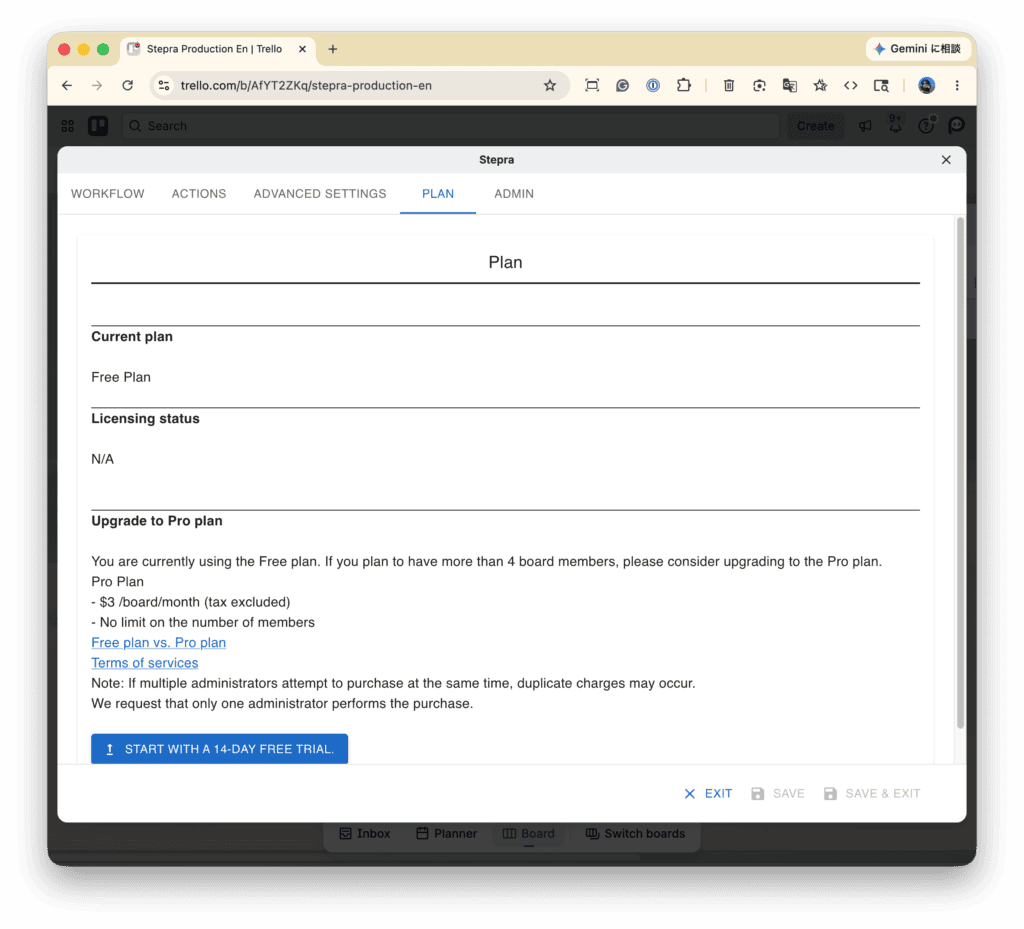
■ Current plan
Your current plan will be displayed.
- Free plan
- Pro Plan
Note: If your Pro Plan has expired, your plan will revert to the Free Plan.
Details of the plan can be found here.
■Licensing status
If you currently have a valid license, its details will be displayed. Even if you don’t have a valid license, information about one you’ve obtained in the past will be displayed.
■ Upgrade to Pro plan
If you are using the Free Plan, a button to subscribe to the Pro plan will be displayed. You will subscribe through the Lemon Squeezy website. After subscribing, Lemon Squeezy will send you an email with a link to access your order. Please keep this link safe, as you will need it to cancel your Pro plan.
When you subscribe to the Pro plan, Stepra links and saves your board ID and license. Therefore, please be sure to subscribe to the Pro plan from this screen.
ADMIN Tab
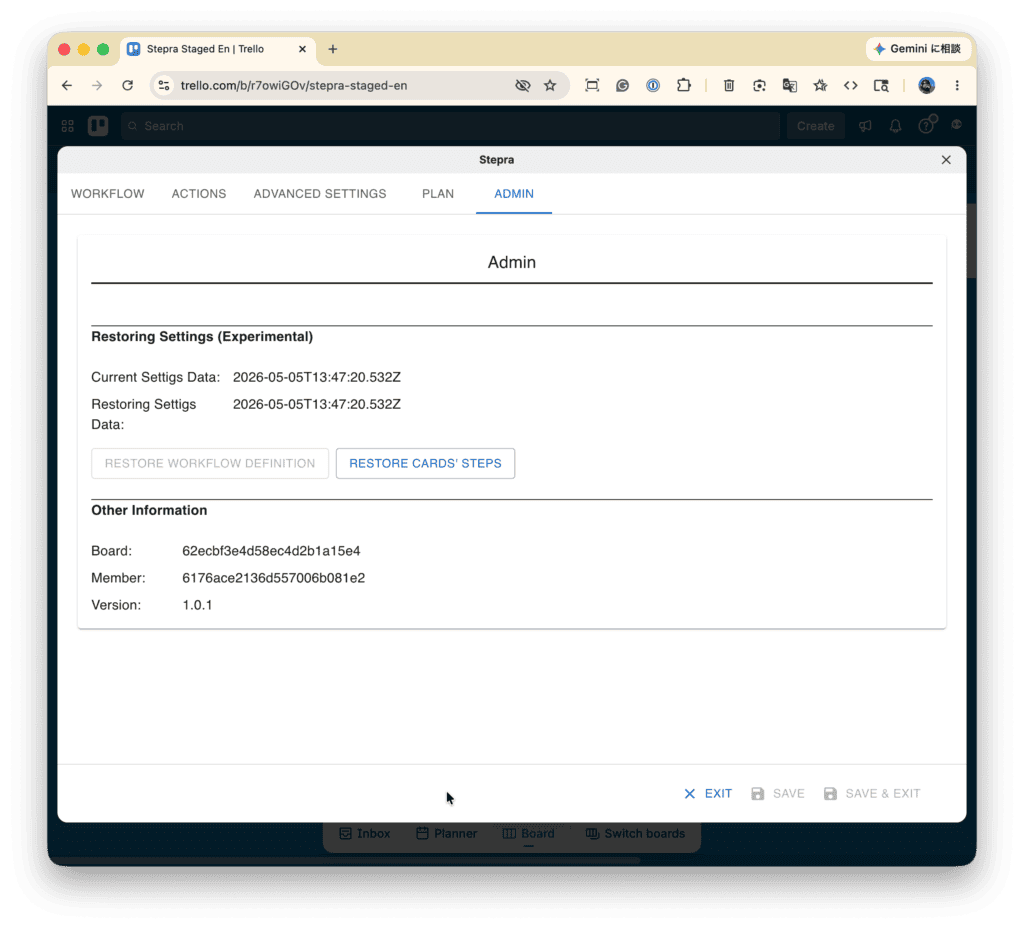
■ Restore settings (experimental)
Trello allows even non-administrators to (accidentally) uninstall Power-Ups. In this case, the Power-Up data may also be deleted (*). “Restore settings” is the last resort that restores settings if Stepra is accidentally uninstalled. However, whether or not restoration is possible depends on the conditions, so it is not guaranteed to work.
* Administrators will be asked whether they want to retain the data. Non-administrators will not be asked, and it is unclear whether the data will be retained. Based on experience, both situations can occur, and it appears unstable.
If your Stepra data is preserved, reinstalling Stepra will restore it to its original state. In this case, the steps described below are not necessary.
Restoration mechanism and points to note
Workflow configuration data
Stepra backs up a copy of your workflow settings to the browser’s local storage once they’re saved. You can use this backup to restore your workflow. However, this data can be deleted by clearing your browser’s cache, etc. Also, because the local storage resides within the browser, it can only be accessed from the browser that made the settings. If no backup exists, you will need to manually restore the workflow.
Card Steps
Unlike workflows, card steps do not have backups. Therefore, the card steps are restored based on the relationship between each step and its list. For this to work, it is necessary that the destination list for each step is defined in “Settings” and that the card is placed in the appropriate list.
⚠️ Warning
When restoring configuration data, do not save your current (empty) settings before the restoration. Saving will overwrite the backup data.
[Restoring settings data]
The date and time the settings were last saved in this browser will be displayed. If it says ‘No Data’, there is no data to restore. In that case, please manually reconfigure the settings.
[RESTORE WORKFLOW DEFINITION]
Pressing the button will restore the workflow and other settings you created in “Edit Power-Up settings.” Please check the contents after they are restored. In particular, if you have edited “Power-Up settings” in multiple browsers, the current browser may not have the most up-to-date data.
[RESTORE CARDS’ STEPS]
Pressing the button will restore the steps on the card.
■ Other information
This displays information about Stepra’s operating environment. Please include this information when reporting problems, if necessary. The IDs are internal Trello IDs.
[Board]
This is the ID for this board.
[Member]
This is your member ID.
[Version]
This is the Stepra version.