A board administrator can edit the Gantt chart. If you have multiple administrators, you have to set a guideline to avoid multiple administrators editing the Gantt chart simultaneously. If they edit the Gantt chart at the same time, it may cause inconsistency between the editing result and its appearance.
To start editing, click the Lock / Unlock Schedule icon to unlock after opening the Gantt chart from the board menu.
Add Issue
Right-click on the project bar to add the first issue.
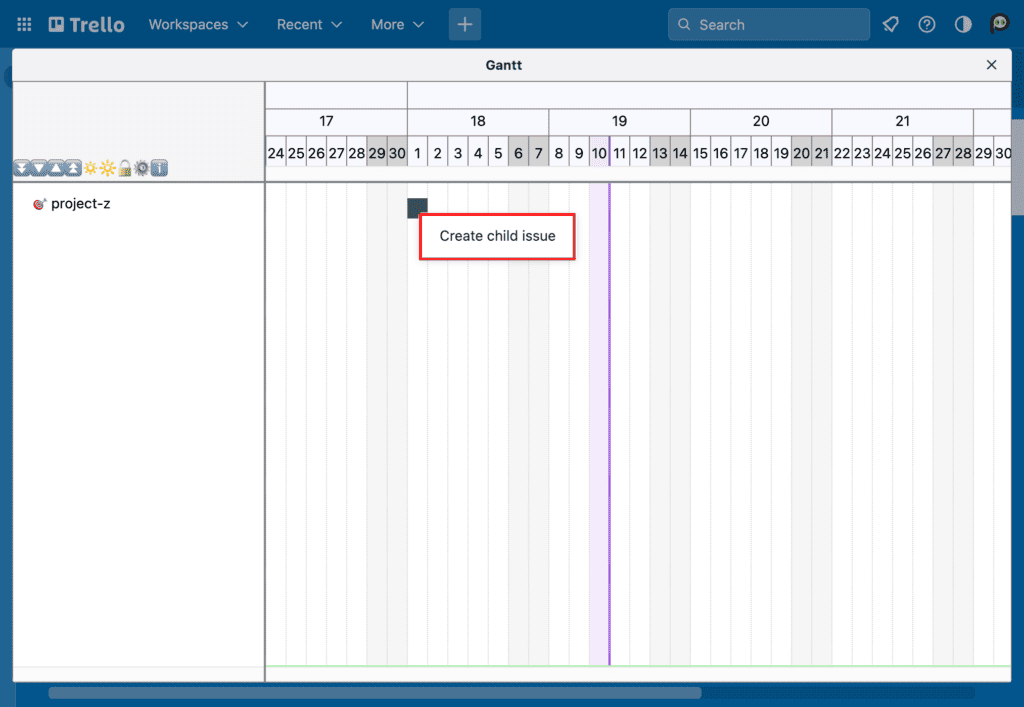
Click the Create child issue popup menu. RedSync shows the New Child Issue dialog.

Enter items to the New Child Issue dialog. Click the Save button when finished.
Right-click an issue bar to add the second and subsequent issue.
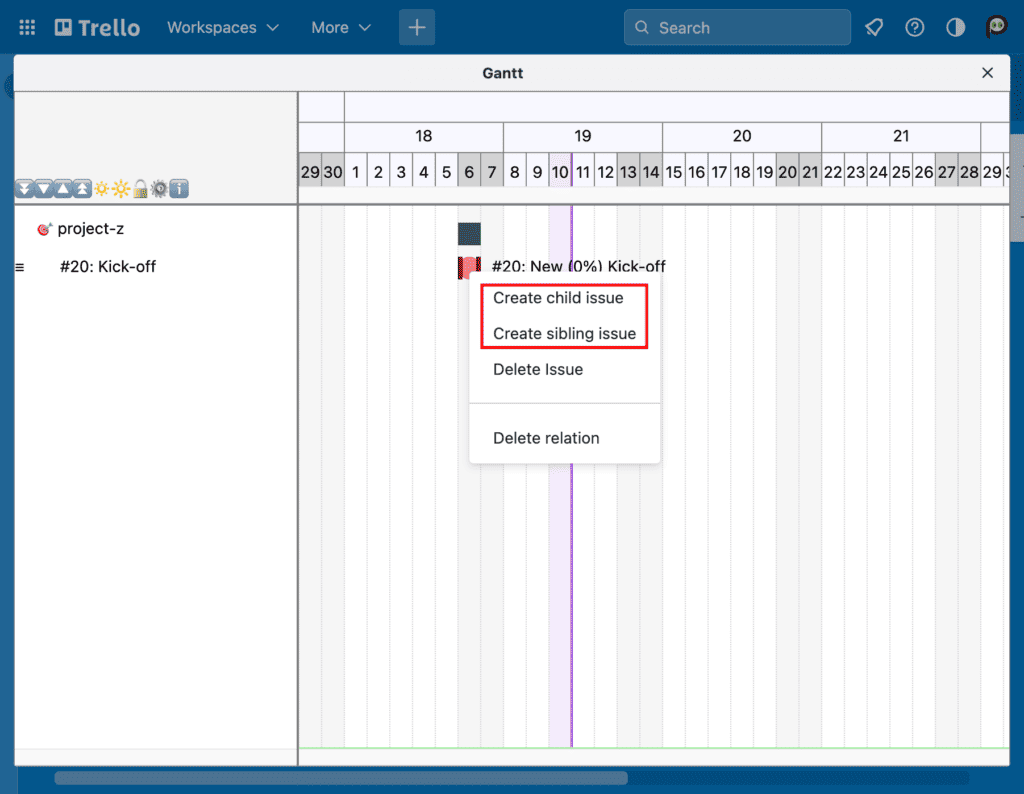
Click the Create child issue or the Create sibling issue. If you click the Create child issue, an issue is created as a child of the current issue. If you click the Create sibling issue, an issue is created at the same level as the current issue.
Delete Issue
Right-click on an issue bar to delete the issue.
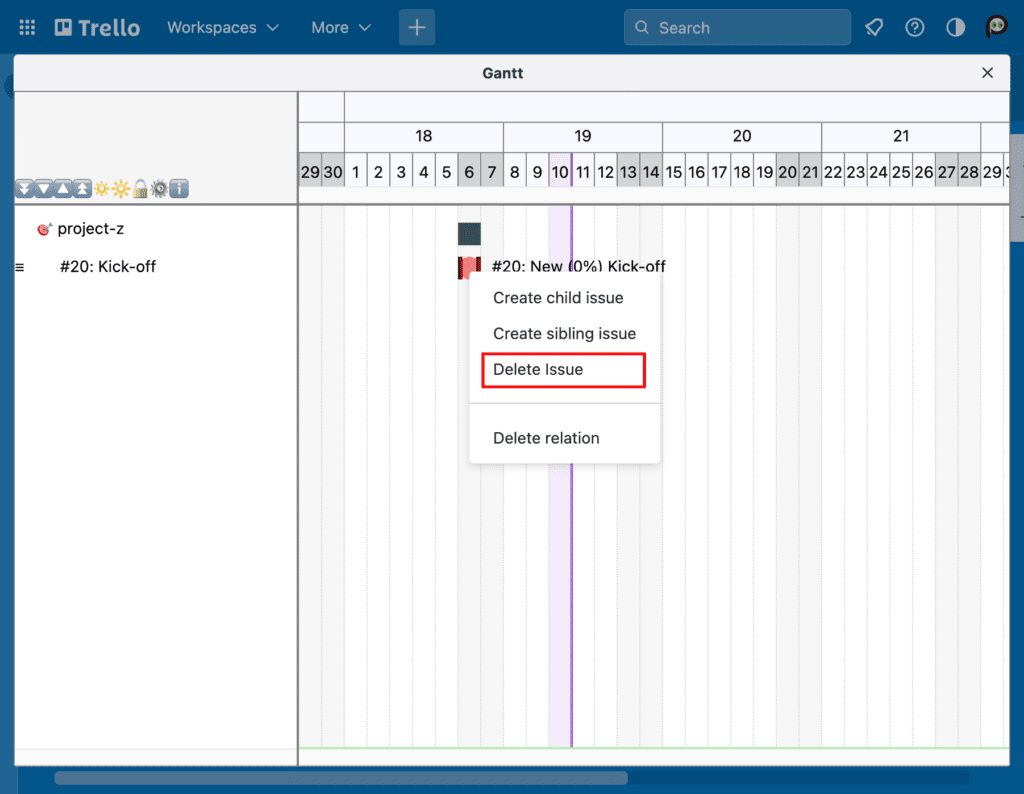
Click the Delete issue, and RedSync displays the confirmation dialog box.
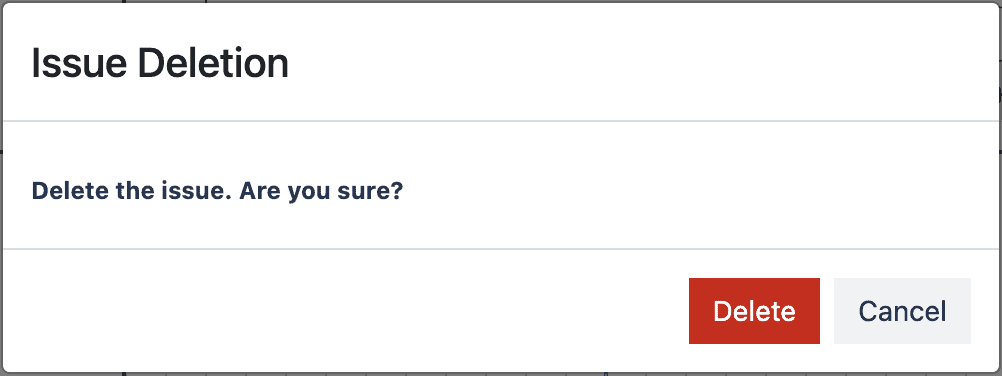
Click the Delete button.
Change Issue’s Schedule
Drag the right or left edge of an issue bar to change the issue’s start date or due date respectively.
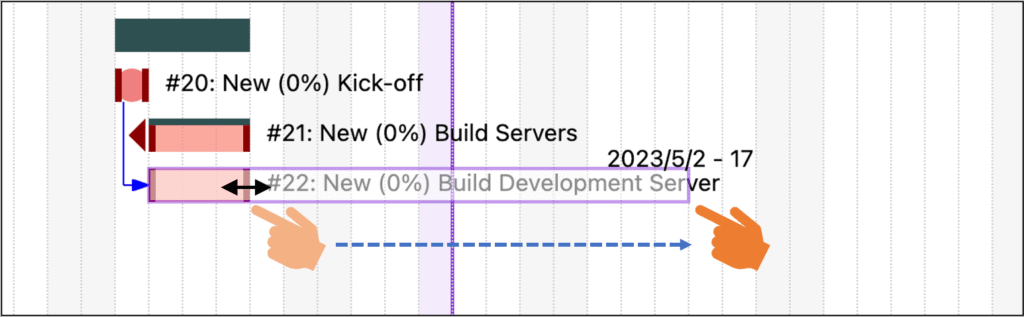
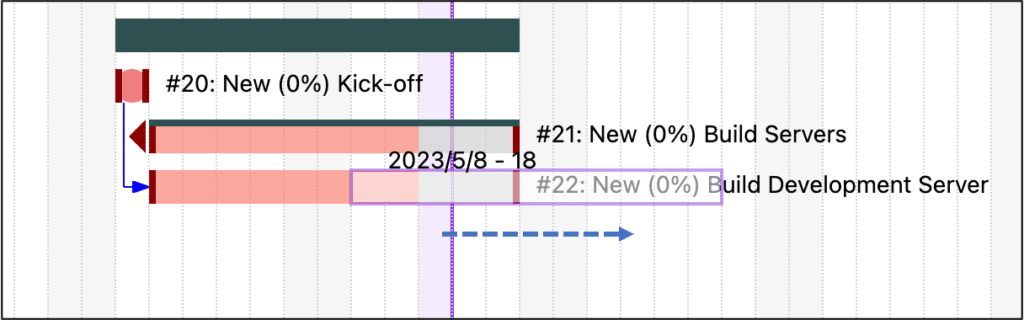
Drag an issue bar to change the issue’s schedule keeping the same duration.
Restrictions on Changing Schedule
If an issue has a preceding issue, there are restrictions on changing its schedule based on Redmine’s behaviors.
- You cannot set the start date of the issue before the earliest starting date.
- You can set the start date of the issue after the earliest starting date. However, if you moved the preceding issue, the start date is forcedly set to the earliest starting date.
Earliest Starting Date – If there is a delay in relation to the preceding issue, it will be the first business day after the due date of the preceding issue, adding the number of days of delay. If there is no delay, it will be the first business day after the due date of the preceding issue.
Regardless of the preceding issue’s existence,
- If you drag an entire issue, the start and due dates are adjusted to avoid overlapping with weekends.
- If you drag the start date of an issue on the weekend, the weekend will not be included in the working days of the issue.
- If you drag the due date of an issue on the weekend, one day will be added to the working days of the issue.
Change of Delay Setting
To change the delay setting for a preceding issue, press the ALT key (Option key for Mac) while dragging either the entire issue or the left edge (start date).
The delay will be removed if the modified start date falls immediately after the preceding issue. Otherwise, the delay will be updated.
If there are multiple preceding issues, all issues’ delays will be reassessed. If you want to change the delay for a specific issue only, you can remove the connection from the popup menu and create it again.
Change Issue’s Parent
Drag an issue on the issue tree and drop it on another issue which is a new parent. Hold a mouse button on the issue node to grab the issue.
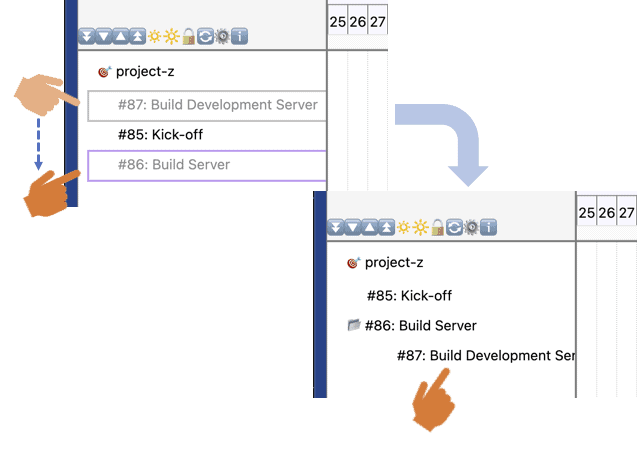
When the Gantt chart is loaded, issues are ordered by their start dates. After changing the parent, the order of issues may be disordered. You can reorder them by clicking the Reorder icon (?) or right-clicking the right-hand canvas’s white space (no bars).
Add Connection between Issues
To add a connection, move the mouse pointer to the outside of the origin issue bar. RedSync shows a triangle as a starting point of connection. Click it.
Move the mouse pointer to an issue to be connected. Click on it. RedSync shows a dialog to input parameters for the connection.
If you select the Preceding as a relation type, RedSync asks you a delay days. If you left it blank, the following issue starts on the working day immediately after the preceding issue.

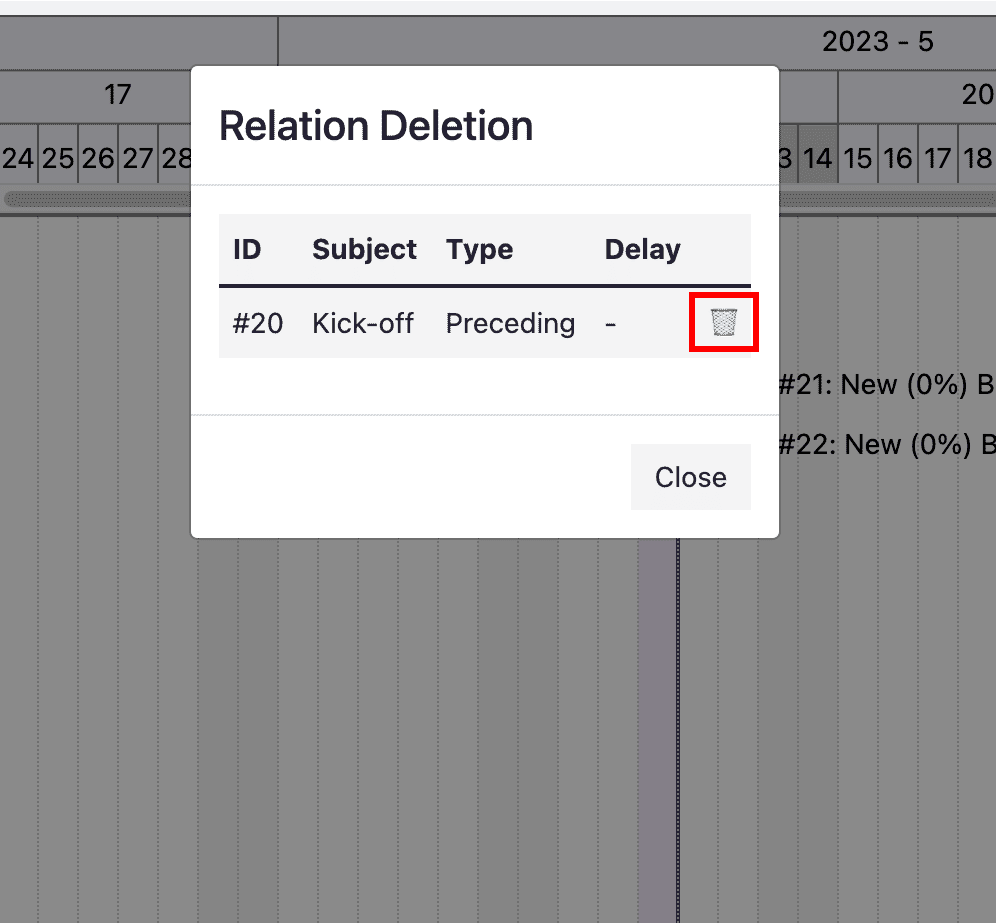
Delete Connection
Right-click the destination issue bar (connected line end with an arrow) of the connection to be deleted.
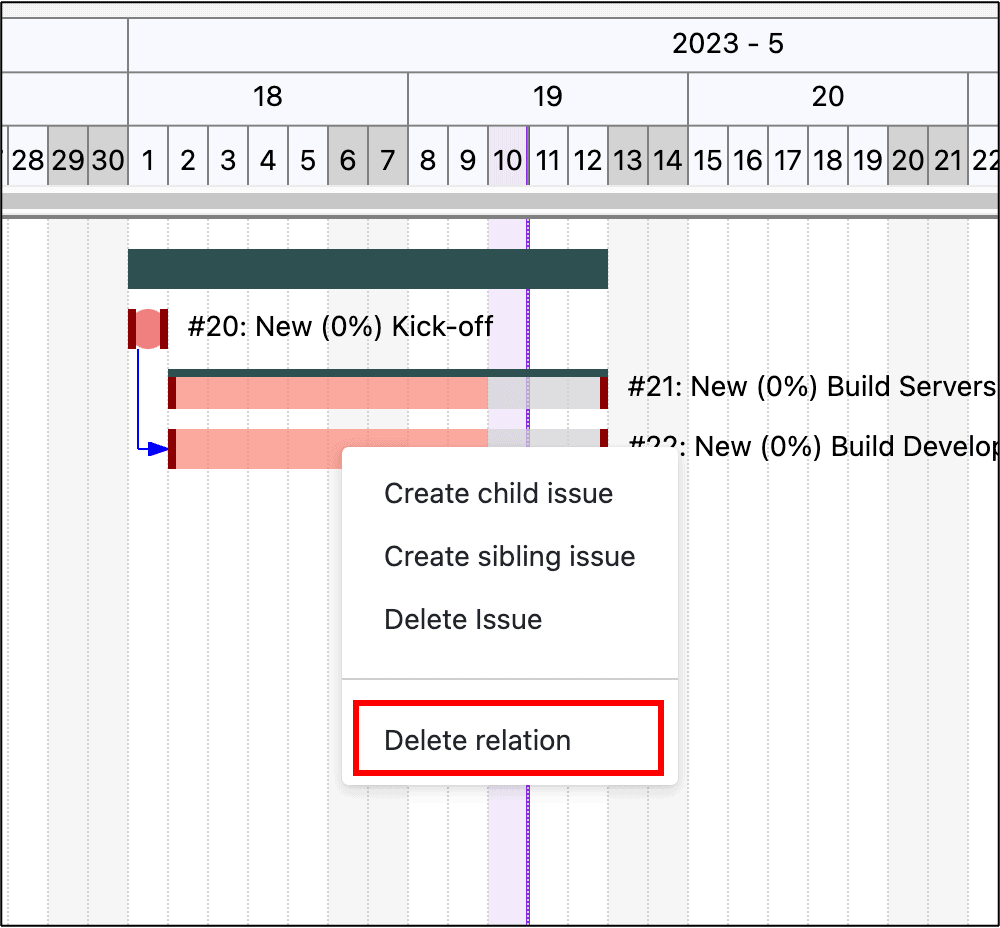
Click the Delete relation.
RedSync shows you the list of connections. Click the garbage can icon.